Reading a Graduated Cylinder- Volume & Displacement Free Online Resources

(For lessons and resources on finding volume using water displacement, please see my earlier blog entry)

Resources: Updated links 11/20/18

  1. Reading Graduated Cylinders – (FREE) A nice power point presentation from Teachers Pay Teachers to introduce students to reading graduated cylinders (link)
  2. How to Read Liquid Volume video (link)
  3. Common Core Worksheet – link
  4. Reading Graduated cylinders – link
  5. Super Teachers Worksheet – practice problems (pdf)
  6. Science Starters/Warm Ups/Do Nows: (Graduated Cylinder ppt), (Beaker/Erlenmeyer ppt)

Tips:

  • The graduated cylinder has markings, like a ruler, to measure volume for water and other liquids
  • I like to use food coloring and water for the students to practice their measurements, it makes it easier for them to read the values, plus it adds some pizzazz to the lab.
    • I mostly use either blue or green food coloring, the red can stain, yellow is not dark enough.
  • Place all materials on a lunch tray for each group to contain spills and make for a very easy clean up.
  • Glass graduated cylinders can break if knocked over, plastic is more durable but can be harder to read.
  • Have students explore how to use read and use graduated cylinders:
    • Students can explore handling and pouring water into the graduated cylinders and reading the values.
    • Once they have mastered pouring and reading, they can practice measuring specific volumes such as 10 mL, 20 mL, 42 mL, 58 mL, etc into the graduated cylinder.
    • You can also set up stations with pre-measured graduated cylinders and have them practice reading the volumes.
      • Have cylinders of different sizes and increments to make it more challenging.
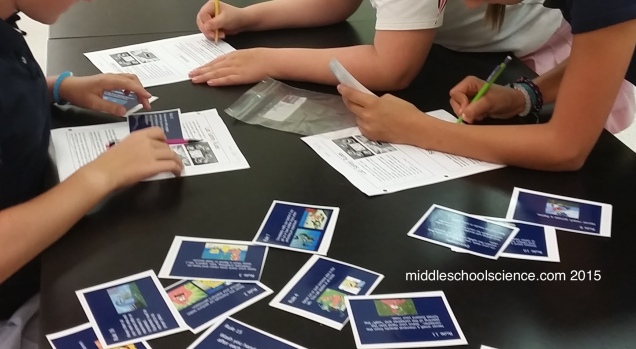
      • You can place task cards/answer keys at each station so students can self check once they have made their readings for immediate feedback.
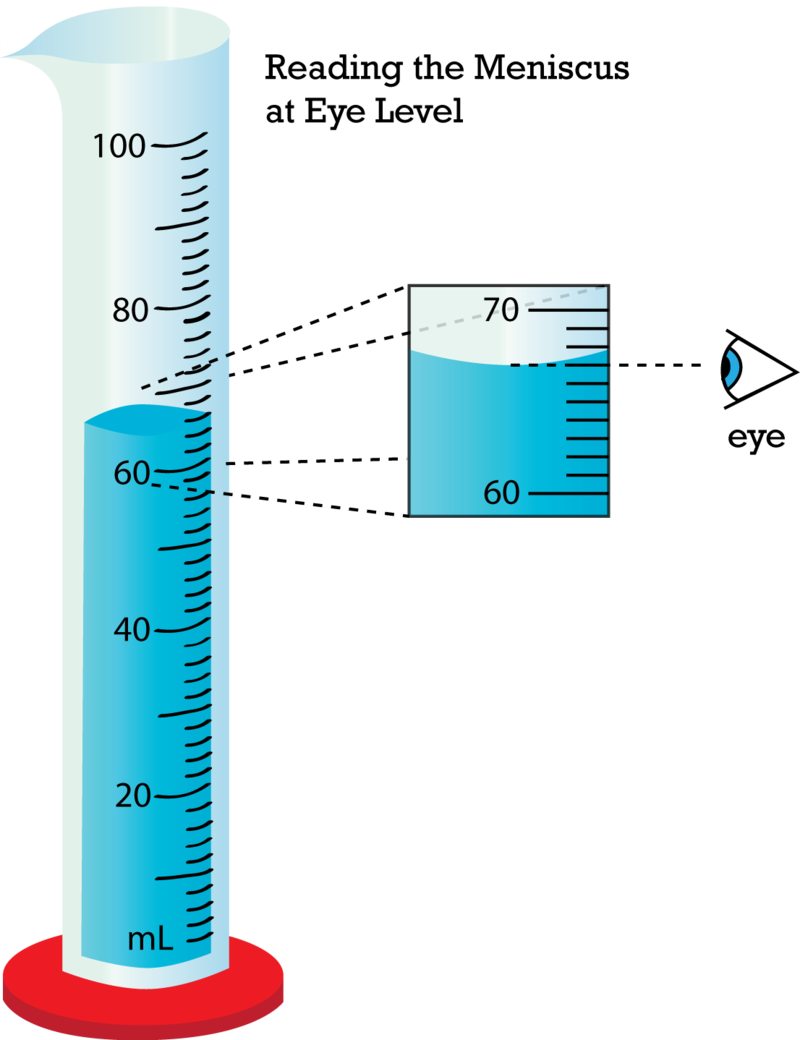
Image Source: CK12

Finding Volume of Rectangular Prisms Using Length x Width x Height

volume_density_blocks

Materials:

  • Handout – Volume Lab (pdf)
    • This handout includes a pre-lab assessment and answer key
  • Rulers
  • Calculators
  • Blocks (set from Flinn)
    • I use these blocks as part of a density lesson as well
    • Prior to this set, I used blocks of scrap wood that were cut in the wood shop, but any rectangular shape works well such as chalk boxes, expo boxes, staple boxes, tissue boxes, playing cards box, dice, etc…

Background

Prior to having the students record the measurements for the blocks, we go over the importance of how to orient the blocks before measuring. A problem that students often run into is that they end up measuring one of the sides two times, and not measuring all three of the sides. Even though the right-hand rule is not used for volume, it helps to find the L, W, & H of each block.

In the image below, Z = Length, Y= Width, and X = Height. Mathematically, it doesn’t matter which side is designated as the width, height, or length since all three sides are multiplied, but this will help students measure all three sides properly. Students should place the block in their hand and align their fingers with the three sides of the block. Once they have decided on how to orientate the block, they can record their measurements.

Image Source: cncexpo.com

For this lab, you can have several stations set up around the room with 1-3 blocks at each station. I assign each block a number and using a black sharpie, write it right on to the block itself. Not all blocks have to be measured, once each student has measured 10-15 blocks, they can go back to their seats and compare their measurements with a partner. We go over the answers together as a class once everyone is done.

Additional Resources:

  1. BrainPOP – Measuring Matter (link)

Hurricane Season: Lessons & Resources

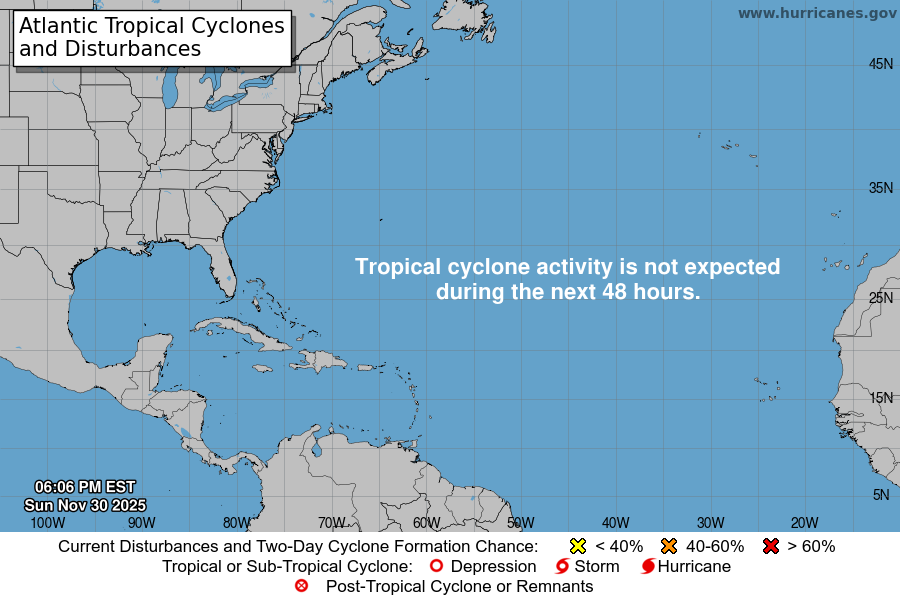
Image Source: NOAA Current Hurricane Activity

Updated August 2016

We are heading into Peak Hurricane Season, with forecasts predicting 12-17 named storms. Using the resources below, students can track Tropical Storms and Hurricanes, as well as learn about how hurricanes form, the parts of a hurricane, the difference between a tropical storm and a hurricane, and the intensities of hurricanes with this mini-unit from my Adopt-a-City Weather Unit (link).

Hurricane Resources:

  • Hurricane Notes (pdf) –
    • How are hurricanes named?
    • Which storm was more destructive, Katrina or Sandy?
  • Tracking Hurricanes (Google spreadsheets)
    • Choose any one Hurricane and plot it on the NOAA/NWS Atlantic Basin Hurricane Tracking Chart (pdf)
  • Practice latitude and longitude: plotting hurricanes worksheet (pdf)
  • Hurricane Isabel 2003: tracking and analysis of Hurricane Isabel (pdf)
  • BrainPOP Hurricanes Video (link) & Activity Sheets (link)
    • this website needs a subscription to view video and activity

View Current Activity using WunderMap: https://www.wunderground.com/wundermap/

  1. Layers: Click on Tropical – deselect any other layers to make map less cluttered for now
  2. Check the box next to Hurricanes/Typhoons to view activity for the US
    • The Legendtab will show Hurricane categories
    • There may not be any activity today
  3. Check the box next to Sea Surface Temperature to view ocean temperatures

Interactive Activities

  • Create-a-Cane (link)
  • Aim a Hurricane (link)
  • Hurricane Tracker (link)
  • How Hurricanes Form (link)
  • NatGeo – Forces of Nature (link)
  • Saffir-Simpson Scale (link) – What happens when a hurricane hits?

Additional Resources:

  • Hurricane Names (link)
  • NOAA/NWS Historical Hurricane Data (link) – Data for every Hurricanes, including maps
  • Weather Underground Hurricane Archive (link)
  • NOAA/NWS National Hurricane Center (link)

SpongeBob Safety Rules and Scenarios Activity

spongebob_scenarios

Materials:

  • SpongeBob® Safety Rules and Scenarios Activity Teacher’s Edition (pptx)
    • this power point can be modified as needed
    • 47 slides with answers for each scenario
  • Scenarios – Student Handout/Notes (pdf)
  • Safety Rule Task Cards
    • one laminated set per group  (4 slides per page pdf)
    • 2 sided handout for each student to keep in notes (9 slides per page pdf)
  • Pencils and highlighters
SpongeBob Safety Rules & Scenarios Activity (3)
Task Cards for all 16 safety rules

Procedures Part 1:

Prior to the students starting the activity on their own, I read the scenarios out loud for the class. As I read the text, students independently made a light pencil mark in each paragraph to indicate broken safety rules – anything that they thought might be an infraction. After I read the story, they worked with their partner to find the broken safety rules using the task cards. After a few minutes, I modeled the first broken safety rule to make sure everyone was on the right track and understood the directions.

  1. Each student will have a handout with all 5 of the scenarios.
  2. Each group will have one set of safety rule task cards.
  3. Groups will need to identify the safety rules that were not followed for Scenario #1 and pull the safety rule task cards related to Scenario #1. The rules that were not broken will be placed in a pile to the side.
  4. Students will lightly underline where the rules weren’t followed in their notes and write the number of the rule for each violation along with a brief 2-3 word description of the rule that was broken in the margin of their notes.
  5. Once they have found and identified all the safety violations for Scenario 1, they will do the same for Scenarios #2-5.
  6. Students will find as many of the 18 violations as they can.
    • I don’t tell the students how many safety violations there are, then they can use process of elimination for the last scenario, I tell them that each safety rule task card will be used at least once so they know that there are at least 16 violations to find.
SpongeBob Safety Rules & Scenarios Activity (1)
There are 5 Scenario Cards.

Procedures Part 2:

  1. Once the groups have completed the 5 scenarios, they will share their findings with the class.
  2. On the ppt, advance to Scenario 1.
  3. Ask one group to start – What was the first safety violation in this scenario? Which rule did SpongBob’s crew break?
  4. Advance the slide and the answer will be highlighted in either yellow or green font (see image below).
  5. The number in parenthesis is the safety rule number.
  6. All students will use a highlighter to highlight the phrase and make corrections if needed.
  7. Ask the next group if there are any other violations in the scenario, if so, what is the next one?
  8. Each group will contribute an answer until all of them have been identified for Scenario 1.
  9. Do the same for scenarios 2-5.
  10. Discuss your results/debrief.
SpongeBob Safety Rules & Scenarios Activity (2)
Each scenario card will reveal the answers, one at a time, and the safety rules that were not followed. The number of the rule is in parenthesis and will match the safety rule task cards.

Additional Resources for this activity:

  • The original worksheet for this activity is from ScienceSpot.net (pdf)
  • Interactive Notebook version of this worksheet (pdf)
  • Marcia has some nice additional activities for Safety on her website (link)
  • This ppt was modified from the original source found at (link)
  • SpongeBob SquarePants® and all related characters are trademarks of Viacom International Inc.
  • For more lessons on Science Skills, click on this page (link)

Making & Sharing Observations: A Telephone Game

Ischnura_heterosticta02
Image Source – Wikipedia Commons

Updated July 2016

Materials:

  • Google Slides  (Public)  – includes directions and photos of damselflies
  • Lesson Plan – (pdf-Instructions)
  • Images to print out and laminate (pdf)
  • 1 Index card per team

I used this activity with my 6th graders to emphasize observations, communication skills, and team work. It is a variation on the classic Telephone Game that many students are familiar with. Depending on the number of students you have, I found that 7-8 per team worked really well. The more students on a team, the more difficult it is to relay the information to each student, and less than 7 was much easier. If your teams aren’t exactly even, that is ok. When grouping students, be sure to mix abilities and plan accordingly for teams that are larger/smaller.

How the game works is I have 10 color photos of damselflies, and each team will make & share observations for one of the photos. The only person who will see the photo, however, is person #1. The rest of the team will not see the photo, and they don’t know what the photos are of. The only information they will have are the 10 observations person #1 will give them. Once each group determines who #1 is, #1 will come up to make and record 10 observations about their photo for 3 minutes. The rest of the team will determine who will receive the information from #1 and the order they will go in. Some strategies will go into determining the order, for example, someone who has a really good memory may want to be person #2.

Students will spread out around the room and take a seat. When the 3 minutes are up, person #1 will go to person #2 and whisper the 10 observations to them for 1 minute. Person #1 will have their index card, but can not give the index card to person #2. Person #2 can ask questions and repeat the information until the 1 minute is up. #1 will take #2’s seat and #2 will go to #3 and share the 10 observations from memory. This will continue until all members have had a turn sharing the observations.

The last member of the team will share the observations with the class and then pick out the photograph from the 10 I have. We will then compare the last set of observations to the original 10 and find out if they were able to choose the correct photo.

This was a fun and challenging activity, and it lead to some really great discussions about making and sharing observations. Many groups had difficulty picking out the original photograph because the information changed or went missing somewhere along the line, just like when they play the game telephone.

NGSS SCIENCE AND ENGINEERING PRACTICES (SEP 1, SEP 4, SEP 8)

  • Asking Questions and Defining Problems
  • Analyzing and Interpreting Data
  • Obtaining, Evaluating, and Communicating Information

Reading a Triple Beam Balance (updated)

New 10/7/18 – Worksheet to record answers – Google Doc

Screen Shot 2018-10-07 at 10.40.52 AM

Here is nice video that gives a general overview on how to use the TBB:

3/28/18, updated again 10/7/18

OHAUS is no longer providing the free online tutorial for this activity – I will post alternatives as I find them.

Screen Shot 2015-06-27 at 5.34.43 PM
Image: Ohaus Scale Reading Exercise

Reading a Triple Beam Balance Worksheet (pdf) and Ohaus website (link)

This is a great interactive tutorial from Ohaus (link). Using the tutorial prior to using the triple beam balance in class significantly improved the student’s understanding of how to find, read, and record the mass of an object to the nearest 1/10th of a gram.

For the tutorial, each student works at their own pace and is given immediate feedback for each answer they submit. The problems are randomly generated and each student has a slightly different experience, as opposed to having each student answer the same set of problems. Students will also review place values for 100s, 10s, 1s, and 1/10ths. (Values for the 100ths place may appear in the answers, but students will only be assessed up to the 10ths place)

Next Generation Science Standards, Science and Engineering Practices (SEP)

  • (SEP2) Practice 2 – Developing and Using Models
  • (SEP4) Practice 4 – Analyzing and Interpreting Data
  • (SEP5) Practice 5 – Using Mathematics and Computational Thinking

‘The Goat by the Water’ : Observation vs Inference (Originally named ‘The Boy in the Water’)

goat_boy_water_observations
Image Source: Project Archaeology

Materials: (Updated July 28, 2017)

  • Updated worksheet for students to use for this activity (Public Google Doc)
    • Changed it from “The Boy in the Water” to the “The Goat by the Water”
    • Changed references from ‘boy’ to ‘kid’ and his/her for gender
    • my students alway bring up that we infer that it is a boy, but it could be a girl, too, and they are right!!
    • also remind them that a ‘kid’ is a baby goat, the goat in the picture has horns 😉
  • I also created Google Slides for this activity (Public)
    • improved answer key
    • also added a ‘make your own inference’ slide at the end
  • The original worksheet(pdf) for this activity is from Project Archaeology (link)

Students often have difficulty distinguishing between observations and inferences, they often combine the two into one statement. For example, when asked to make an observation using the image above some students might say: “The kid fell into the water because the branch broke.”  

Instead, they should say “there is a kid in the water” and “there is a broken branch” as two separate observations. There is no “why” in the statement. Another student may say: “The goat pushed the kid into the water when he/she was trying to pick up his/her sailboat.” This is not an easy habit to break and takes some practice.

We then discuss the difference between the facts and the “story” that goes with it. The facts are our observations and the story is how we piece the facts together, or our inference.

Observations:

  • There is a kid is in the water
  • There is a goat is standing next to the water
  • There is a broken tree branch
  • There is a sailboat is floating in the water

Inferences:

  • The branch broke when the kid was sitting on it, and s/he fell into the water.
  • The goat butted the kid into the water when s/he was picking up her/his sailboat.

After defining and discussing the differences between observations and inferences, students will have a chance to work with their partner to practice identifying and classifying the statements related to the image of the boy in the water. Once everyone is done, as a class, we then discuss each statement and confirm each as either an observation or inference.

On your worksheet, use the picture of the kid in the water to determine if the statements are observations or if the statements are inferences. Place an “Inf” in the blank for inference and an “Obs” in the blank for observation.

Cup Stacking Collaboration Challenge

Cup Stacking Challenge

Goal

  • Students will collaborate, problem solve, and persevere to accomplish each challenge

Materials – per group of 3-4 students

  • Task Cards – cut apart, laminate, and secure with a metal ring or brass brad
  • 6 cups
  • 1 rubber band
  • 4-6 pieces of string of equal length

This is one of the team building exercises I plan to use with my 6th graders during the first week of school. Many variations of this lesson can be found online. For this version, I created 6 different challenges for the students to tackle – each one increasing in difficulty. Not every group will get to complete all 6 challenges, and that is OK. The objective is to learn to work together as a team and not give up.

July 26, 2017 – One recommendation I have for this activity is placing the cups on the floor, when the cups fall off the table it makes it more difficult to complete the task in a timely manner.

Updated: Pictures September 2015

Working as a team to complete a task
Trying to pick up a cup that fell over.
Almost done with Challenge #4!

Discussion & Reflection

  1. Which challenge was the easiest for you group to complete? The most difficult? Why?
  2. Did your techniques change as you advanced to each challenge? Explain why or why not.
  3. Describe a technique that worked best within your group.
  4. Compare using two hands vs. one hand when holding the string to guide the cups. List advantages and disadvantages for each.
  5. Compare using verbal and nonverbal communication, what were some of the challenges your group faced?
  6. If you were to complete this activity again, what would your group do differently? What would you do the same?
  7. Why are collaboration and communication skills important characteristics for scientists to have?
  8. Did you feel like giving up at any point? How did you and your group deal with frustration?

NGSS Middle School (6–8) Evidence Statements

NGSS has released the Evidence Statements for Middle School Science – (link)

In the table below, links for each standard will take you directly to their website and documents.

Physical Sciences                                                                   

   Life Sciences                                                               


    Earth and Space               Sciences                                           

 Engineering, Technology, and Applications of Science
     Full PS PDF       Full LS PDF        Full ESS PDF        Full ETS1 PDF
     Full PS1 PDF      Full LS1 PDF       Full ESS1 PDF        MS-ETS1-1
       MS-PS1-1       MS-LS1-1        MS-ESS1-1       MS-ETS1-2
       MS-PS1-2       MS-LS1-2        MS-ESS1-2       MS-ETS1-3
       MS-PS1-3       MS-LS1-3        MS-ESS1-3       MS-ETS1-4
       MS-PS1-4       MS-LS1-4        MS-ESS1-4
       MS-PS1-5       MS-LS1-5      Full ESS2 PDF
       MS-PS1-6       MS-LS1-6        MS-ESS2-1
     Full PS2 PDF       MS-LS1-7        MS-ESS2-2
       MS-PS2-1       MS-LS1-8        MS-ESS2-3
       MS-PS2-2    Full LS2 PDF        MS-ESS2-4
       MS-PS2-3       MS-LS2-1        MS-ESS2-5
       MS-PS2-4       MS-LS2-2        MS-ESS2-6
       MS-PS2-5       MS-LS2-3      Full ESS3 PDF
     Full PS3 PDF       MS-LS2-4        MS-ESS3-1
       MS-PS3-1       MS-LS2-5        MS-ESS3-2
       MS-PS3-2    Full LS3 PDF        MS-ESS3-3
       MS-PS3-3       MS-LS3-1        MS-ESS3-4
       MS-PS3-4       MS-LS3-2        MS-ESS3-5
       MS-PS3-5    Full LS4 PDF
    Full PS4 PDF       MS-LS4-1
       MS-PS4-1       MS-LS4-2
       MS-PS4-2       MS-LS4-3
       MS-PS4-3       MS-LS4-4
      MS-LS4-5
      MS-LS4-6

Planet Sorting Activity – Comparing, Contrasting, and Categorizing the Planets

Image Source - NASA
Image Source – NASA

I used this activity last week with my 6th graders and I was happy with how the activity went. Students were engaged, challenged, and made great observations about the planets. They came up with a variety of ways to organize the planets into categories based on data from the fact cards.

It was challenging to come up with categories that neither student had used yet once they met with their 3rd partner. This lead to longer discussions and deeper thinking between each pair, which lead to categorizing the planets in categories that were less obvious at first.

Students worked at their own pace and let me know when they needed a new partner. This staggered the pairings and allowed both the students who needed more time and the students who worked quickly to work at a pace that was comfortable for them. Students also enjoyed trading partners and changing seats.

Materials

  • Teacher or student created Planet Fact or Planet Trading Cards (public link) or (blog entry)
  • Planet Sorting Activity Handout (pdf)

Part 1

  1. On your desk, you will have a set of planet fact cards.
  2. You and your partner will sort the planets according to each category.
  3. Write down one fact for each planet within the category.

Part 2

  1. For the next 5 categories, you and your partners will create new ways to sort the planets.
  2. Create the first new category with your partner and have it approved before starting.
  3. Write the title of your category on the line.
  4. Label the headings for each column, how will you sort the planets?
  5. Give one fact for each planet used.
  6. You must use at least 5 planets to complete the category.
  7. When you and your partner are done, have your work checked and then you will be paired up with a new partner.
  8. Follow steps 2-7 above.
  9. You will create 5 different categories with 5 different partners.
  10. When you are done, you can work on the challenges in small groups.

Possible Categories that students will use:

  1. Period of revolution shorter or longer than Earth?
  2. Period of rotation shorter or longer than Earth?
  3. Number of rings – more or less than ______?
  4. Atmosphere has Hydrogen or doesn’t have Hydrogen?
    1. Helium, Carbon Dioxide, and other gases can be used, too
  5. Planet was discovered before or after ____________
  6. Planet known since Ancient Times or discovered after _________
  7. Temperature is either below or above ________ ºC
  8. Planet has one average temperature (- or +) or a range of temperatures (- to +)
  9. Average temperature of planet is colder or hotter than Earth
  10. One day is shorter or longer than a year
  11. Planet is tilted sideways or planet is not tilted sideways
  12. Planet has life or doesn’t have life
  13. Planet has liquid water or doesn’t have liquid water
  14. Planets you can see or can’t see easily without a telescope
  15. Planets that have or don’t have phases we can see from Earth