Materials:
- Google Slide Presentation (Public) – a fun way to introduce the parts of the atom and how to determine the numbers of protons, neutrons, and electrons. Get ready to do some singing and snapping 🙂
- Handouts – via ScienceSpot.net
Materials:


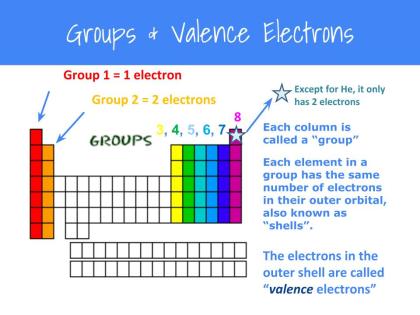
This is a fun way to introduce the families of the periodic table and their properties. The students really enjoy watching the video clips from Periodic Table Videos and the experiments performed by the Chemistry Department at the University of Nottingham.
As a class, we found the location of each family, recorded the elements for each family, discussed their properties, color coded the periodic table, and discussed any patterns they noticed.
Materials
This activity was featured on the following blog post: The Joy of Chemistry – A Unit in Photos a few years ago. You can read about how she used this lesson in her 3rd grade classroom as part of her Chemistry unit.
Below is a video about Sodium from Periodic Table Videos. They have a lot of great chemistry videos posted for free on their site, be sure to check them out!


Materials:


Materials:


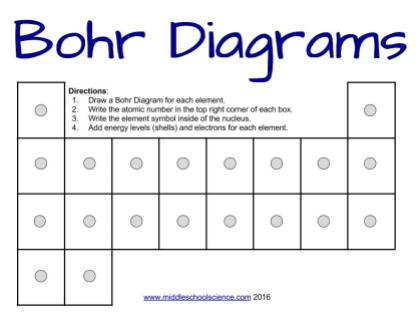
I updated the Google Slides and worksheet for my lesson on drawing Bohr Diagrams. This lesson will walk your students through the basics on how to draw a Bohr Diagram for the first 20 elements on the periodic table. I also created a simple worksheet for students to record their drawings and do independent practice.
You can access them at:
For additional lessons related to atoms and the periodic table, please click on the tags below.
My 6th graders recently completed “Bond with a Classmate” from Tracy’s ScienceSpot website. I have used this activity successfully with both 5th and 6th grade science classes over the years. Here is the description form her website:
Bond with a Classmate (Gail Sanders, Monroe Middle School, Wheaton, IL)
In this activity from Gail Sanders, a member of the MidLevel Science Teachers group in Northern Illinois, students are given a tag (or necklace) to wear with the symbol of an ion and its oxidation number. Positive ions are green and the negative ions are blue. The students are instructed to “bond” with other ions and keep a record of their bonds. Students had to work with their bonding partner to agree on and write a formula and name for the compound they formed. Once that was done, they could break the bond and find a different ion with which to bond. After 5 bonds, students switch tags with another student and start bonding again.
Lesson Worksheets: Bond with a Classmate Cards (pdf) and Bond with a Classmate worksheet (pdf)
I have a modified version of the student handout posted here (link pdf file). If you have a smaller group of students, I would suggest changing cards after 3 bonds. When a student has successfully made 3 bonds, they come up to my desk, I quickly check their bonds for correctness, and then give them an oppositely charged ion. For example, if a student is Mg +2, they would then receive Cl -1 and make 3 bonds with that new ion.
The version in the video posted above is a more challenging version of the activity, I would suggest 8th grade or higher. Bond with James – free lesson plan on TPT (link). You can also combine both set of cards.
I don’t use the yarn for this activity, the students carry the cards around with them and it is easier for them to place the cards on the table when they pair up so they can write down the formula and compound name more easily instead of looking down and upside down at their cards.
If you have used this activity, would love to hear how it worked with your students and if you have any other ideas to add to this lesson.