Exploring the Solar System – Past, Present, and Future Missions

Image Source: NASA
Image Source: NASA

After taking an in-depth look at missions to Mars (blog entry) and learning more about the planets in the solar system (blog entry), we learned about past, present, and future unmanned space missions and their mission objectives.

Materials

  • Desktops/Laptops and Internet Access
  • JPL Missions Website (link)
  • Mission Assignments using Google Sheets Template (public link)
  • Mission Information using Google Slides Presentation Template (public link)
  • Sample slides from one of my 6th grade groups (pdf)

Each group of students created a shared Google Slides Presentation, and within each group, students were assigned 4-6 numbered slides with specific missions (public link). This was a great way for the students to learn about different missions, practice their research, tech, and collaboration skills, and to get a better understanding of the history of unmanned space missions.

When students were done with their slides, the next class involved a fun game of “Name that Mission” (girls vs boys). Using slides that the students created, I pulled a total of 20 or so slides from different groups and classes and added animations to them. If they could name the mission without clues (just an image of the spacecraft) they earned 2 points, if they named the mission with clues, they earned 1 point.

Below is a video about DAWN – the mission will be arriving at Ceres this week (March 6th) narrated by Leonard Nimoy. LLAP.

Planet Sorting Activity – Comparing, Contrasting, and Categorizing the Planets

Image Source - NASA
Image Source – NASA

I used this activity last week with my 6th graders and I was happy with how the activity went. Students were engaged, challenged, and made great observations about the planets. They came up with a variety of ways to organize the planets into categories based on data from the fact cards.

It was challenging to come up with categories that neither student had used yet once they met with their 3rd partner. This lead to longer discussions and deeper thinking between each pair, which lead to categorizing the planets in categories that were less obvious at first.

Students worked at their own pace and let me know when they needed a new partner. This staggered the pairings and allowed both the students who needed more time and the students who worked quickly to work at a pace that was comfortable for them. Students also enjoyed trading partners and changing seats.

Materials

  • Teacher or student created Planet Fact or Planet Trading Cards (public link) or (blog entry)
  • Planet Sorting Activity Handout (pdf)

Part 1

  1. On your desk, you will have a set of planet fact cards.
  2. You and your partner will sort the planets according to each category.
  3. Write down one fact for each planet within the category.

Part 2

  1. For the next 5 categories, you and your partners will create new ways to sort the planets.
  2. Create the first new category with your partner and have it approved before starting.
  3. Write the title of your category on the line.
  4. Label the headings for each column, how will you sort the planets?
  5. Give one fact for each planet used.
  6. You must use at least 5 planets to complete the category.
  7. When you and your partner are done, have your work checked and then you will be paired up with a new partner.
  8. Follow steps 2-7 above.
  9. You will create 5 different categories with 5 different partners.
  10. When you are done, you can work on the challenges in small groups.

Possible Categories that students will use:

  1. Period of revolution shorter or longer than Earth?
  2. Period of rotation shorter or longer than Earth?
  3. Number of rings – more or less than ______?
  4. Atmosphere has Hydrogen or doesn’t have Hydrogen?
    1. Helium, Carbon Dioxide, and other gases can be used, too
  5. Planet was discovered before or after ____________
  6. Planet known since Ancient Times or discovered after _________
  7. Temperature is either below or above ________ ºC
  8. Planet has one average temperature (- or +) or a range of temperatures (- to +)
  9. Average temperature of planet is colder or hotter than Earth
  10. One day is shorter or longer than a year
  11. Planet is tilted sideways or planet is not tilted sideways
  12. Planet has life or doesn’t have life
  13. Planet has liquid water or doesn’t have liquid water
  14. Planets you can see or can’t see easily without a telescope
  15. Planets that have or don’t have phases we can see from Earth

Planet Fact or Trading Cards

Planet_fact_cards Google Slide Template (public Link)

  • Option 1 – share one google slide presentation with 16 students
    • work in pairs to complete 1 of the 8 planet fact cards
  • Option 2 – share one google slide presentation with 3-4 students
    • students will work in small groups to complete 1 set of 8 planet fact cards, creating multiple sets per class

Fact Cards:

  • Using the NASA website – Solar System Exploration (link) – students will gather facts and images for each planet.
  • Print 2 or 4 slides per page
  • Laminate Cards (optional) for in class activities/lessons, as task cards, students can trade cards, or use as study guides

Missions to Mars

After our Moon unit, with a focus on the Apollo Missions, we are now looking at Mars. We have talked about the Orion Spacecraft (link) and how we want to return to the moon and eventually travel to an asteroid or Mars (link).

I posed the question: What are some of the different ways we can get information from Mars if people haven’t been there yet? We then discussed the differences between a flyby (paparazzi photographers), orbiters (satellites), landers (stuck in one spot), and rovers (robots that drive).

Before showing the video above, I asked the students to think about how the Curiosity Rover landed on Mars and to brainstorm what the sequence of events would look like for it to get from here to there.

They came up with some really great ideas, and many of them named a few of the different steps from the sequence of events. After seeing the video, we discussed each step of the sequence and why they had to happen in that order, and where things could go wrong. About 50% of our missions to Mars (all countries) have ended in failure.

To get further background information, we looked at the history of Mars exploration. Where have we been? What do we know? What do we want to know? What worked? What didn’t work?

For this activity, I divided the class into small groups. Each group was given a time period of Mars Exploration from the 1960s to future missions. Once each group gathered information for their missions, we briefly discussed each one.

Materials

  • Laptop
  • Google Spreadsheet – (public link)
    • shared file per class: each group is assigned one tab to complete OR
    • shared file per group: each member of the group will complete one tab of information
  • NASA Mars Missions website – (link)
  • NASA JPL All Missions website – (link)

Current Mars Missions

For more lessons about Mars, see my Space Science Page.

Earth & Mars Chart: Cut & Paste Comparison Activity

Earth & Mars Comparison Chart

NASA has so may wonderful resources that you can use in your classroom. I saw this great website (link) that compared the Earth and Mars using a chart with detailed infographics. Using the information posted, I created a ppt to go along with the website and a cut-n-paste activity worksheet for their notes.

Materials

  • Earth and Mars Comparison Slides (ppt) – select ‘read only‘ to view
  • Posted 8/4/18Google Slides
  • Earth and Mars Comparison Chart (pdf)
    • print out for students to cut and paste answers
  • scissors
  • glue sticks

Each student will receive a blank Earth and Mars comparison chart. They will cut out the facts and sort them into either the Earth or Mars column, and place them next to the categories that are found in the center of the page: such as Diameter, Gravity, and Length of Day. They can work with their partner to discuss their ideas as they sort through the facts.

Once everyone was ready, we went over the answers as a class. If the student had the answer in the right position, they glued it into their notes. If it was incorrect, they placed the fact to the side for later and put the right answer into its place, and glued it on.

The next day, I asked the kids to recall facts about Mars and Earth before they opened their notes and I was happy with how much they were able to remember from doing this activity.

Earth, Moon, & Mars Venn Diagram Activity

Earth, Moon, & Mars Venn Diagram

We recently started our Mars Unit and I wanted to have a fun/active way to connect our unit on the Moon to our new unit on Mars. This activity can be used in a few different ways, I used the first lesson posted below.

Materials:

  • Google Slide (Public) Earth, Mars, & Moon
    • Updated July 2016 – when I used this lesson in early 2015, it was prior to the discovery of flowing liquid water on Mars – the slides have the updated fact in the Venn Diagram
  • Updated Answer key and handouts (pdf)
  • 16 facts, printed, cut apart, and glued onto index cards (in pdf above)

gravity-mars-facts

Whole class activity

  1. After discussing what we know about Mars (accessing prior knowledge) and guessing how big Mars is compared to Earth (many were not really sure), I gave each student one of the sixteen facts. They were not to share their facts with the class until it was their turn to present.
  2. They may or may not know the answer to their fact, and we discussed this first. I told them I would give them clues if they needed help and not to worry too  much about getting the answer ‘wrong’.
  3. After a minute or so to think about it, I asked the person with Fact #1 to stand and read their fact to the class. The rest of class was to think about the fact and where it might go into the Venn Diagram, but not share their answers.
  4. The person with Fact #1 then had to guess where the fact fit into the Venn Diagram. Once they gave the right answer, I clicked on the ppt and the answer popped up on the screen.
  5. Everyone wrote fact #1 into their notes.
  6. Then I asked the person with Fact #2 to read their fact to the class, and so on until all 16 facts were posted.
  7. We would discuss each fact and any questions they might have.
  8. If you have more than 16 students, you can have them work with a partner and guess together.

Cooperative Groups

  1. Instead of each student having only one fact, you can have the class work in cooperative groups and give one set of the 16 facts to a group of 4 students. They will cut apart the facts (or you can give them the facts pre-cut) and one student will work on fact #’s 1-4, another #’s 5-8, third on #’s 9-12, and the 4th on #’s 13-16.
  2. The students will discuss the facts within their group and place them on top of the Venn Diagram.
  3. Once each group has had a chance to discuss their facts, you can go over the answers as a class and have each student write the facts into their notes.

Independent Seat Work, or as part of a Station/Center/Review

  1. You can also do this activity where each student will cut out all 16 facts and work independently to figure out where each fact would go in the Venn Diagram. They will then write in the facts as each answer is discussed.
  2. As a station/center activity/review, you can have a blank laminated Venn Diagram, a laminated answer key, and laminated facts. Students can guess where each fact goes into the diagram, then check their work with the answer key and write the answers into their worksheet

Earth and Moon Comparisons Activity

earth_moon_comparison

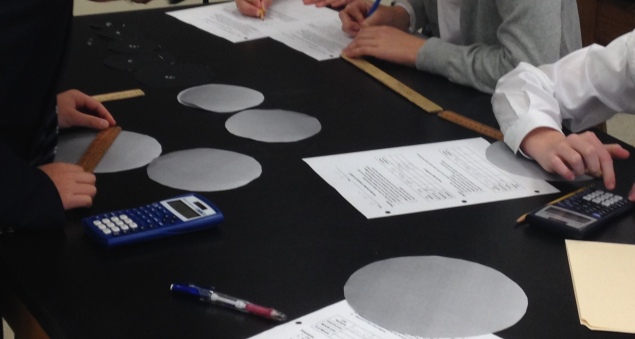
This is a great hands on activity to get students thinking about the size of the Earth compared to the Moon, distance, and rotation vs. revolution. In this handout are 4 mini-activities that cover:

  • Compare the size of the Moon to the Size of Earth.
  • How many Moons could fit inside the Earth?
  • How far away is the Moon?
  • How does the Moon rotate and revolve around the Earth?

Materials:

  • Student Worksheet (pdf) with Teacher Answer Key
  • Circle templates (pdf) to represent the Moon and the Earth
    • Templates are cut out prior to activity and placed in a large zip-top bag, one set per group, (construction paper, oak tag, or plain computer paper works well)
  • Rulers & calculators
  • Pennies – 50 per group, then later 1 per student
  • Quarters – 1 per student
  • Styrofoam ball with a small flag, or something small, pinned to it

Details for the lesson are in the handout. As the students were working, I visited each group to check on their progress and hear their ideas. I held off on revealing the real answers to the first 3 parts until everyone was done with all of the activities and after we discussed our ideas and reasons for the choices they made as a class.

For the Rotation vs. Revolution, I had them try out their own ideas on how to make the penny rotate and revolve around the quarter before I demonstrated it with a styrofoam moon.

If you use this lesson in your class, write about it below 🙂

Quiz, Quiz, Trade – Apollo Missions

Recently, I tried the “Quiz, Quiz, Trade” (QQT) method of review to help my students study for their Apollo Missions assessment. How does it work? See the video below:

Materials:

Procedures:

Before starting the activity, I modeled how to ask, answer, and trade using student volunteers. We also discussed ‘quizzing etiquette’. What do you do if your partner is stuck? How can you give clues to help jog their memories? What are some things that you should or should NOT say if someone can’t answer the question, even with hints? After you go over the answer with your partner, are there any tips to help your partner remember the answer? I stressed the importance of helping each other learn. It is not just about getting the answers right or wrong and no one ‘wins’ if they answered the most questions correctly.

Each student was given one question to start the activity. Because I had more questions than students in my class, after a student makes 3 trades, I had the students hand in/trade their cards with me to introduce new questions into the mix as needed. Some students will answer more questions than others, and that is ok. The students quizzed/traded with each other for about 20 minutes. While they were quizzing each other, they kept track of which questions they answered correctly, and which ones they needed to work on using this handout: Quiz, Quiz, Trade Numbers  (pdf)

Sample Question Card

For the second half of the review activity, I divided the class into two teams. I would randomly pick one question to ask each team. Before I asked the question, I announced the number of the question I was going to ask them. The students on each team then looked at their sheets to see who had that answered that numbered question correctly and chose one person to come up to answer the question. If no one had the numbered question answered correctly (or did not have a chance to answer it during QQT), they would volunteer a ‘tribute’ to try to answer the question. If the first team answers correctly after I read the question to the class, they earned a point. If answered incorrectly, the other team had a chance to steal and earn the point. We really enjoyed playing QQT and I plan on using it again in a variety of ways.

This is also a great way to practice vocabulary words. Using index cards, students can write the vocab word on one side and the definition on the other. You can also use it for identification skills – show a picture on one side, and the identification on the other. For example, one side can have a picture of a beaker, and the other side will have the word ‘beaker’ to practice identifying lab equipment. Other ideas include: plant identification, constellation identification, cloud identification, metric conversions or abbreviations, etc…