Comparing Surface Temperatures

Materials:

  • Heat lamp
  • Stand
  • Clamp
  • Infrared Thermometer
  • 6 beakers each of sand, water, gravel (other items can be used, or more than 3 can be added)
  • Meter Stick
  • Handout with instructions, data collection, and questions (Google Doc)
  • Google Sheet for graphing (Google Drive)
  • Newsela Reading – Heat Islands & Questions (Google Doc)

Directions:

Day 1:

Explore the campus on a sunny day and select both natural and manmade surfaces and record data. Enter data into spreadsheet – what patterns do you notice?

HW: Read newsela article and answer questions, discuss next class, how does this relate to our findings today?

Day 2:

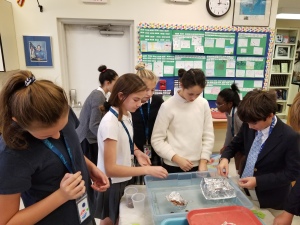
Set up heat lamp experiment for a minimum of 25 minutes, make predictions, which surface will heat up the most? How hot will it get? What location (1-6)? Enter data and discuss results.

HW: Lab write up and discuss results next class

This was the first time I did this experiment, and seeing the results definitely had the ‘wow’ factor with my 6th graders, seeing the temps was actually surprising, esp for the rocks under the heat lamp. Many students thought the sand would be the hottest from their experience walking on hot sand at the beach in July/Aug. Also, the surface temp of the playground was surprising since it was a rubbery light colored composite and not dark colored asphalt. Prior to this activity, we took notes and discussed heat – radiation, convection, and conduction, and notes on sunlight and how it causes the seasons and different climates on Earth. Under the heat lamp, position 1 was analogous to being at the equator while position 6 was at the poles. The Google Sheets will automatically graph your results once the data is entered.

If you use this activity, would love to see your results!

Notorious B.U.G.s

Notorious B.U.G.s Research and Poster

As part of our entomology unit, students choose an insect that negatively impacts humans in at least one area of our daily lives: agriculture & horticulture, disease, economic hardship or nuisance.

Using Google Classroom, each student receives a blank Google Draw document and has artistic freedom to design their poster as long as the research requirements are met. I am able to check their work and add comments/corrections as they are doing their research and give real time feedback.

This is the handout with the requirements and for fun, we usually do a draft pick format to select insects.

Volume of a Penny Lab – New!

This slideshow requires JavaScript.

Problem: How can we use water displacement to calculate the volume of one penny?

Materials:

  • Volume of a Penny Lab (PDF)
  • Graduated cylinders (25 mL, 50 mL, or 100 mL)
  • Cup or beaker of water, food coloring optional
  • Pennies – 100+ per group
  • Tub
  • Plastic Spoon – to pour water out of graduated cylinder and separate pennies

Screen Shot 2019-10-18 at 10.33.54 PM

This is a simple & fun lab to have students practice measuring and reading volume as well as use water displacement to determine the volume of  a penny – an irregularly shaped object.

Students will design their own series of 10 tests with the following criteria:

  • All pennies must be under water inside of the graduated cylinder.
  • The volume of water must not pass the 100 mL (or highest) increment.
  • All data is recorded carefully.

Students were able to carefully measure and determine that the volume of a penny was 0.35 mL – most students were very close with a range of 0.33 – 0.37 mL.

https://www.instagram.com/peckscience/

Back to School: Group Ice Breakers

Ask/Answer/Trade: FREE Google Slides

On the first day of school as part of our advisory period, we gather the 6th graders together (about 40 students) and take them outside to do this ice breaker as a whole class. The 5 advisors model how to do this activity and then we hand each student a card and allow them to mingle and mix for about 10-15 minutes.

This slideshow requires JavaScript.

Strike a Pose

I am not really sure what the name of this activity is, so I just call it “strike a pose” – if you know what it is, please let me know in the comments so I can update it 🙂

This is also a really fun large group activity where the kids get to run around outside and make different poses. Start off with everyone just mingling around, and then you call out a “pose” for them to strike. When starting this activity, use multiples that total the number of students you have so that no one is left out in the first few rounds. For example, it you have 40 students, you can do poses that need a pair of students, a group of 4, a group of 5, etc. Then, after a few rounds, you pick a number that does not fit evenly. Mix up the groupings randomly, they have to figure out how many people to complete the pose. The students that don’t pair up with someone, will then sit out. You can keep going until you have a handful of students left or restart at any time. This is really fun and the kids will grab anyone near them to complete the pose!

Examples of Poses:

  • Single: Statue of Liberty, Michael Jackson, Spider Man, Hulk, a bowler
  • Duos: Batman & Robin, Sonny & Cher, Tennis Partners, Woody & Buzz
  • Trios: Charlie’s Angels, Nirvana, Jonas Brothers, Three Musketeers
  • Group of 4: Beatles, Fantastic 4, Ghost Busters, Teenage Mutant Ninja Turtles
  • Group of 5: Basketball team, The Incredibles, Jackson 5,
  • Group of 6: Brady Bunch, Volleyball Team, Cast of “Friends”
  • Group of 9: Baseball /SoftballTeam
  • Everyone – class of 20XX
  • etc…

Please add additional ice breakers in the comment section!

Cabbage Juice – Quick & Easy Set Up

Screen Shot 2019-04-05 at 8.57.22 AM.png

Quick & easy – no fuss – no mess – way to prepare cabbage juice:

  1. Chop up half of a purple cabbage
  2. Add to a coffee pot
  3. Fill with very hot water from sink or water cooler
  4. Let it sit for at least 20 minutes
  5. Pour into flasks, beakers, or plastic cups
  6. Add a pipette or spoon to containers

You can add more hot water during the day as you use it, refrigerate leftovers if using next day.

Here is the link to my Cabbage Juice Lab: https://middleschoolscience.com/2016/02/28/cabbage-juice-lab-ph-indicator/


Penny Boat Challenge

Screen Shot 2018-11-29 at 5.46.29 PM.png
Crushing the 500 + barrier!

Materials:

  • Rules & Jobs for the challenge (Google Doc)
  • Google Sheets to keep track of results
  • Heavy Duty Aluminum Foil
    • 15 x 15 cm for prototypes
    • 30 x 30 cm for competition
  • 2 or more large storage tubs filled with water
  • tub for ‘boat graveyard’
  • tray
  • towels – at least 8+
  • box of pennies – 5,000+
  • cups to hold pennies


Comparing Mitosis & Meiosis Resources

meiosis-vs-mitosis-gif.gifIntro to Meiosis with a comparison to Mitosis

This slideshow requires JavaScript.

Amoeba Sisters Videos:

DNA, RNA, & Crime, Oh My! (Modified Snorks Activity)

This is a fun and creative activity to tie all of the following concepts together into one lesson: DNA sequencing & transcription, mRNA translation, amino acid codons & proteins, genotype, phenotype, recessive & dominant alleles & traits.


This slideshow requires JavaScript.

Students will help solve a crime based on DNA evidence left on a lollipop at the crime scene. There are 3 versions of the same scenario that will identify 3 different criminals so you can use them for 3 classes – this avoids having the kids tell the next class who the suspect is ;). Each student will receive one of the 4 DNA samples – you can have students work individually, or have a group of students work on suspect 1, another on suspect 2, etc. (Sorry – I do not have an answer key to post)

Directions: Worksheets: DNA-RNA-Crime-Snorks-2018 & Amino Acid Codon Wheel, & additional resource: 20 Amino Acids

  • Step 1 – students will transcribe the DNA sequences into mRNA sequences
  • Step 2 – using the Amino Acid codon wheel, they will determine the amino acid for each codon
  • Step 3 – using the chart, they will find protein using the sequence of amino acids
  • Step 4 – using the proteins, they will determine the phenotype
  • Step 5 – using the phenotypes, they will determine the genotype(s)
  • Step 6 – is their suspect the criminal?
  • Step 7 – they will draw a mug shot of their suspect using the phenotypes they decoded

This lesson was modified from the one found on Biology Corner: https://www.biologycorner.com/worksheets/DNA_snorks.html 


Pedigrees & Genetic Disorders

This slideshow requires JavaScript.

Free Resources:

Videos:


Finding the Mass, Volume, and Density of Water Lab (Google Sheets)

Materials:

Goals

  • Students will practice their measurement skills using a graduated cylinder to determine volume and a triple beam balance to determine mass.
  • Students will determine the density of water by completing 10 trails and finding an average.

I use this lab to tie their measuring skills together and introduce the concept of density. We then do further explorations of density and practice using the formula.

This lab is a modified version of the lab posted at Middle School Chemistry – for further details about the lesson, please click on this link.