
This activity was a yearly tradition and one of our favorite 6th grade research projects.💎 I would leave them hanging in my room until the end of the following school year when the new ones replaced them. (links updated 2025)
Objectives – students will choose and research a mineral of their choice and create a 3D cube showcasing their mineral.

Materials:
- Google Slides Template – each student will have a template in Google Classroom.
- All information and images are placed inside of the 4in x 4in text box
- Students will research and work on their slides during 2-3 class periods, the rest is on their own time, including crafting and designing the mineral cube
- I gave each student a 6x6x6 cardboard box and wrote their names on them in sharpie.
- Students can make their own cube out of any type of cardboard, such as cereal or tissue boxes and tape the edges together to form the cube.
- Mineral Cube Choices and Rubric Spreadsheet: Student can choose any mineral of their choice (there are over 3,000 named minerals) but their mineral has to be used for something, it can’t be a collector’s sample or very rare.
- We have a draft pick and no two students can have the same mineral.
- Some of my favorite Mineral Guides I had in my classroom over the years:
- Websites such as:
Distance Learning Edition May/June 2020
Mineral Cube 2020 – Distance Learning was not going to stop us from completing this annual tradition! Students chose their top 10 Minerals and we completed the 2020 Draft Pick using a random name picker to determine the order of each pick. We used one of our Live Zoom Sessions for me to explain the project, go over tech issues, answer questions, and to complete the draft pick.
Using Google Classroom, I made a copy of the template for each student and was able to review their work each day. Students then spent 3 days researching and designing their slides, then a few days building their cubes. We then shared our cubes using Google Slides – each student added their info to one slide and were able to see each others completed Mineral Cubes.
Sample Google Classroom directions:
For the next 3 science classes – you will work on your Mineral Cube Research and gather supplies for your Mineral Cube. I will grade 2 slides each day and give you a classwork grade. When we have LIVE classes, you will sign in and I will look at your slides in real time and answer questions and make suggestions.
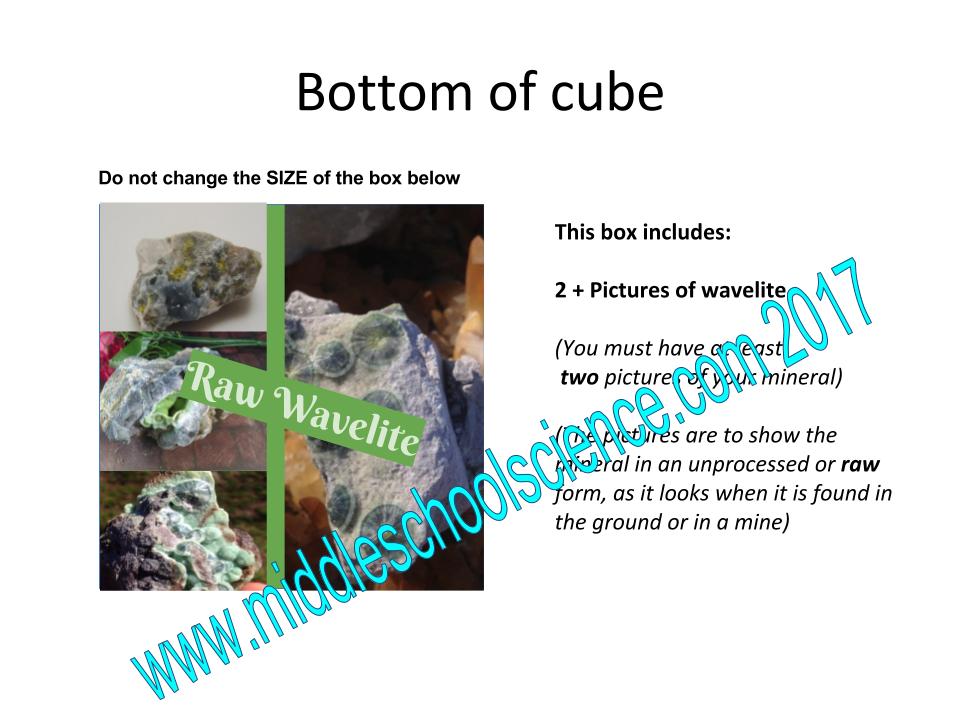
- Lesson 17: Slides 3 & 4 – the TOP and BOTTOM of the Cube
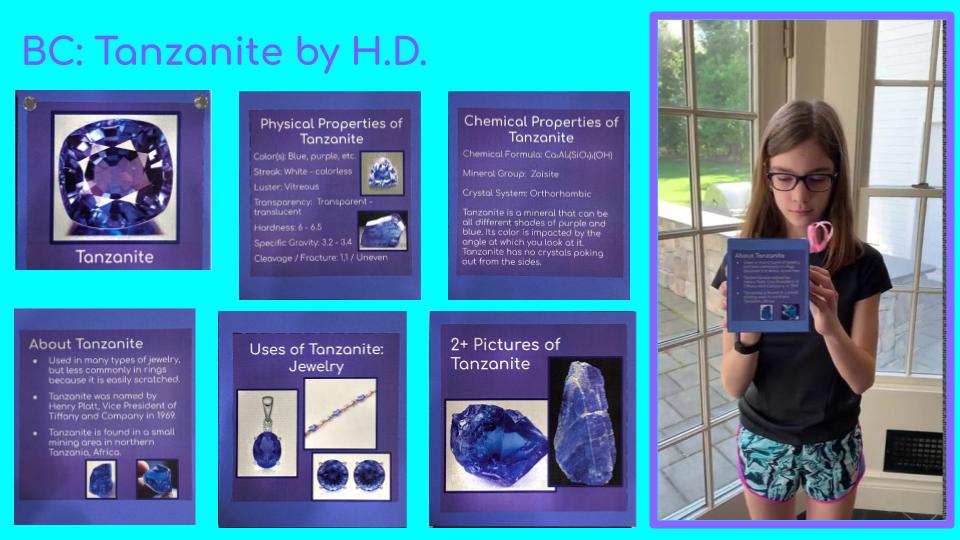
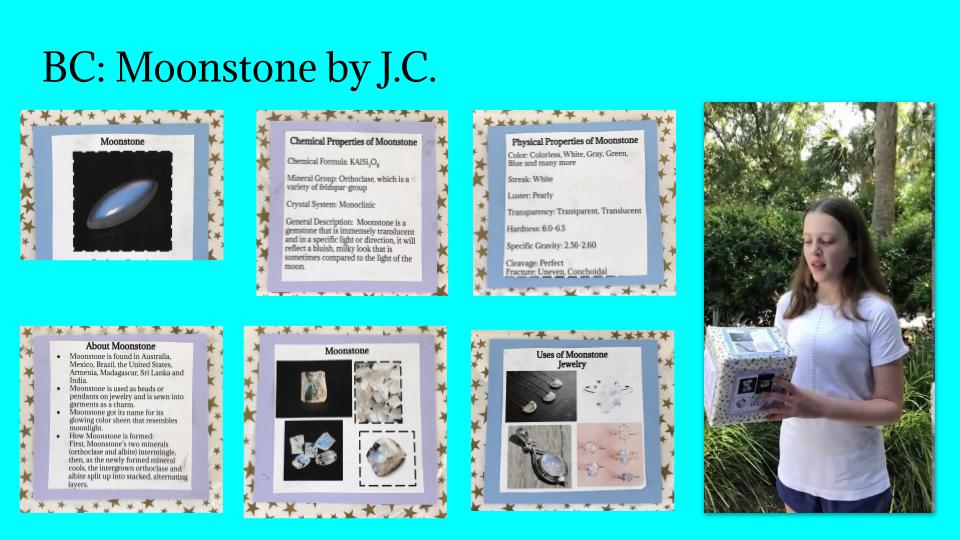
- Lesson 18: Slides 5 & 6 – Chemical and Physical Properties of Mineral
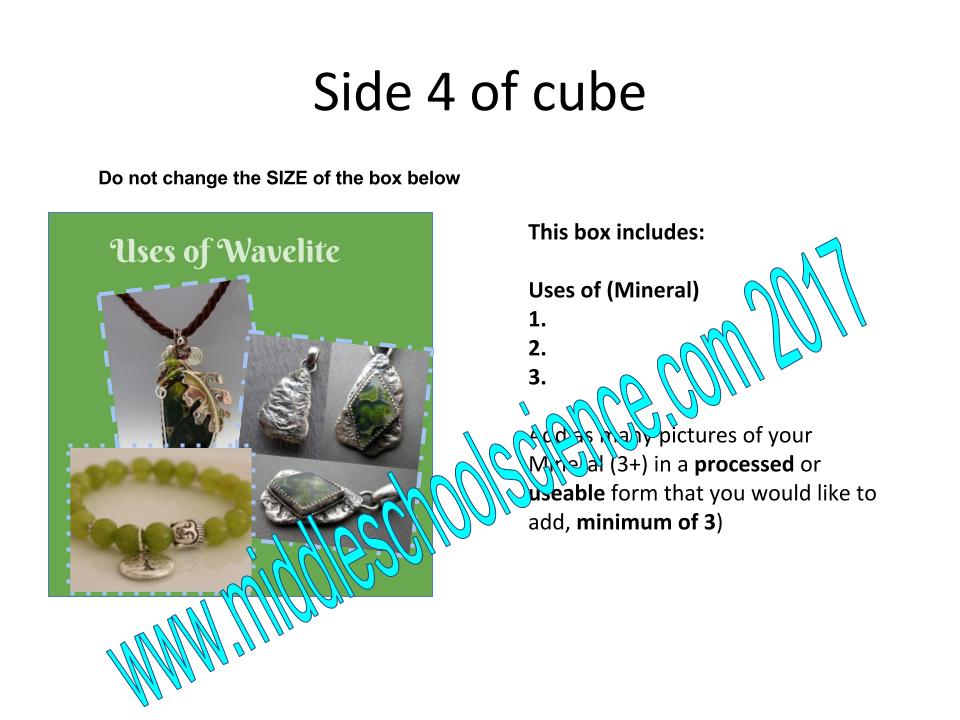
- Lesson 19: Slides 7 & 8 – About and Uses of Mineral
- Lesson 20:
- 1. Finalize your slides – make corrections and read my comments, and complete your slide designs.
- 2. Print and cut out the 6 sides of the cube.
- 3. Assemble your mineral cube.
- 4. Add pictures and videos of your mineral cube by Monday to the slides posted for 5/11.
2020 Update Google Slides Template Link – Mineral Research
Completed Slides Template – Students had the option to upload a video of them holding their Mineral Cube and showing all the sides in addition the images of each side.

Comments are welcome!