Newer Version – Group Analogy Presentation: (updated 4/27/25)

Students are assigned into small groups (3-4 students) and each group will come up with an analogy for the cell organelles based on their chosen theme. Groups will then take turns presenting their theme and analogies to the class.
Some themes the students have used over the years are: schools, hotels, stadiums, restaurants, Santa’s workshop, beach resort, amusement park, medieval village, Minecraft, castle, Amazon warehouse, The White House, etc. Themes are on a first come first serve basis, they have to give a rough outline with examples to show me how their analogies would support their theme before they start their slides. Once a theme is picked, no one else in that class can use the same one.
During the presentations, students will take notes to compare and contrast each groups use of analogies for the organelles.
Lesson Materials:
- Parts of the Cell – color and label the organelles of both plant and animal cells and discuss their functions. We did this as a guided lesson and colored matching organelles at the same time – for example, if we identified the mitochondria in the animal cell and colored it orange, they would look for and color the mitochondria in the plant cell orange as well. I edited the colors on the worksheets so that they would match for both diagrams.
- Animal cell – select pdf or Google doc
- Plant cell – select pdf or Google doc
- Function and analogy – (pdf) cut and paste activity for reinforcement from ScienceSpot.net and additional resources
- Planning Notes – research for the parts of the cell and theme ideas, Google Doc, make a copy to edit
- Template for presentation – Google slides, make a copy to edit
- Presentation notes – students will take notes of the themes and analogies given by each group, Google doc, make a copy to edit
- Bingo Cards – use these cards to review Organelles, Cell Cycle, and Mitosis, 30 cards in pdf
Below are some sample slides for one group’s theme which was our school:
Older Version – Jigsaw method:
This is an updated version on how to use the ‘Jigsaw Method’ for students to learn about cell organelles that includes a tech component – each expert group will create Power Point slides for their assigned organelles. When each expert group is done, they will have one complete set of slides that they will use to teach each other in their home groups, use as a resource to review at home, and/or print out flashcards (4-6 slides per page) if needed.
Materials
- Google Slides Template (public link)
- One shared google doc per home group
- To save this ppt – click on “File” then “Make a Copy” or “Download as” and choose the format you would like. Please do not request editing access to this file – that would change my version of this slide show.
- Worksheet for 4 expert groups (pdf)
- Worksheet for 5 expert groups (pdf)
- this allows for less information per expert group, but larger home groups
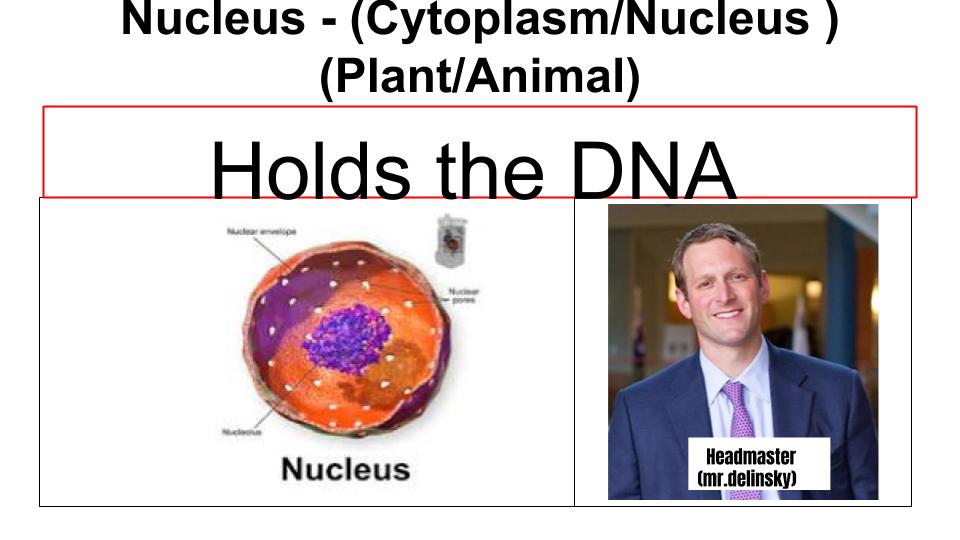
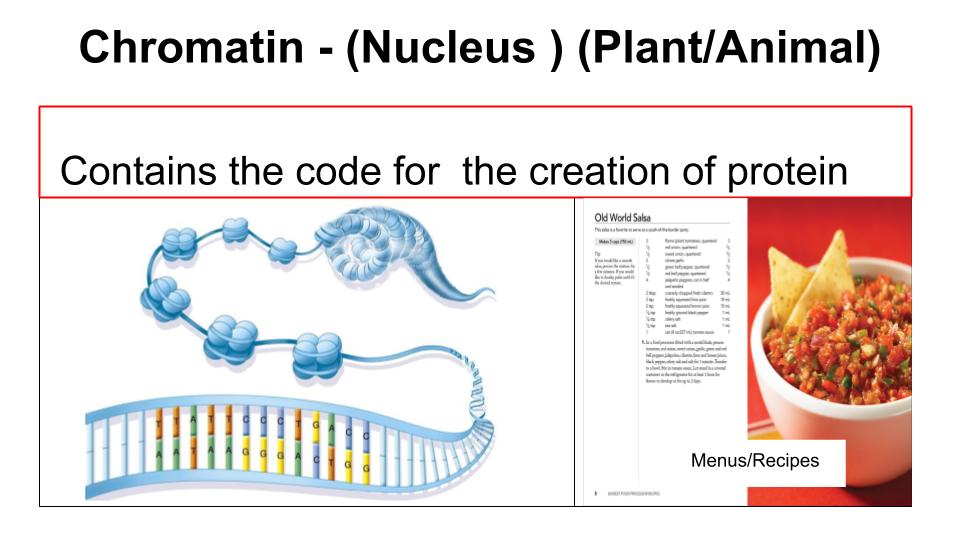
Group 1 contains an expert from A, B, C, & D. All of the “A” members will sit together to research their assigned organelles. Each member of group A will research and create their own slides for the Nucleus (slide 2), Nucleolus (slide 3), Chromatin (slide 4), and Centrioles (slide 5). Home group members (B, C, & D) will add their information to the rest of the slides at the same time A is adding information from the A expert group.
On each slide, they will include the following information:
- Name of organelle
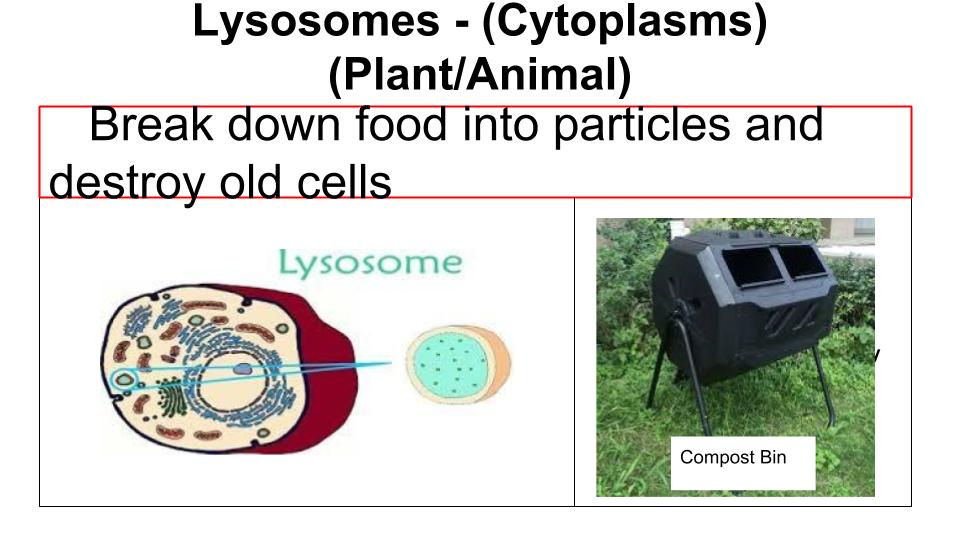
- Location (Nucleus or Cytoplasm?)
- Plant, Animal, or Both?
- Function
- Images of the organelle
- Image of an analogy for that organelle
Encourage students to use the animation feature to have the information appear sequentially instead of seeing all the information as soon as they advance to the next slide. This will help with note taking when they are presenting their information to their home group.
After each expert group is done with their research, they will return to their home group. The member from group A will go first, and using presentation mode in Google Slides (via desktop/laptop/tablet) they will teach their home group about the nucleus, nucleolus, chromatin, and centrioles. Members B, C, and D will write their notes on the handout provided. When A is done, the member from expert group B (via desktop/laptop/tablet) will present his/her organelles in the same manner.
If possible, having each student use their own laptop or desktop for the research phase (expert groups) and then only one laptop or tablet for the presentation part (home group) would be the best option so that their focus is on the person who is presenting.

Comments are welcome!